Setting Up Laragon Environment
Embarking on the WordPress journey becomes a breeze with Laragon. This powerful local development environment streamlines the process. It provides a comprehensive, isolated space for WordPress development. Below, we walk through the necessary steps to get WordPress up and running using Laragon effortlessly. Download and Install LaragonDownload And Install Laragon
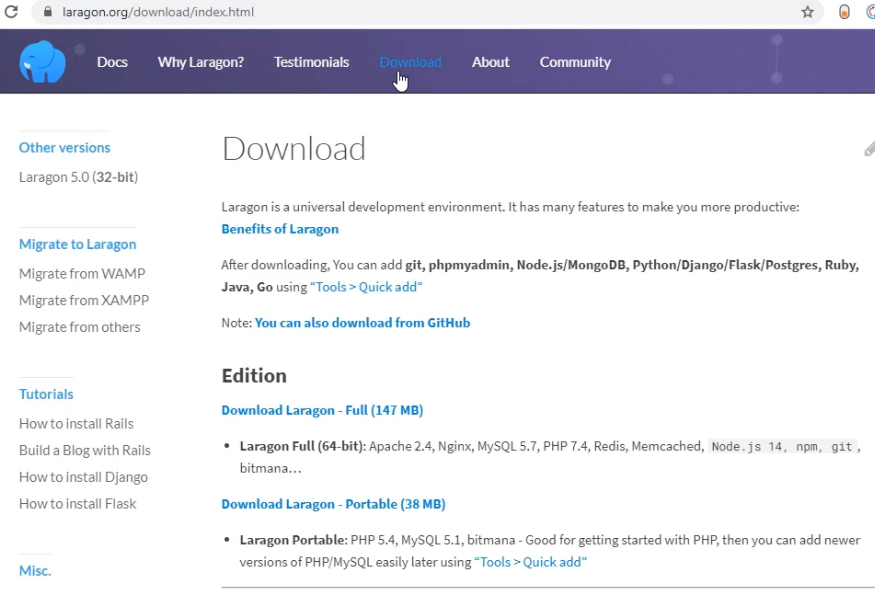
Laragon’s installation process is straightforward. Follow these steps:- Visit Laragon’s official website at
https://laragon.org/download/. - Select the Full version for a complete package or the Lite version for a basic setup.
- Click the Download button.
- Once downloaded, run the
.exefile and follow the on-screen instructions. - Choose your desired installation path and proceed with the installer.
- After installation, launch Laragon from your desktop or the Start menu.
Configure Laragon For WordPress
Configuring Laragon for WordPress is seamless. Follow these guidelines to set up the environment:- Open Laragon and click on the Menu button.
- Navigate to Quick app > WordPress.
- Enter your project’s name. Laragon automatically creates the database.
- Press OK and wait for Laragon to download WordPress.
- Laragon extracts WordPress files into a new project directory.
- Upon completion, your default browser will open with the WordPress setup page.

Installing WordPress
Installing WordPress just got easier with Laragon! Whether you’re new to website development or a seasoned pro, setting up WordPress on Laragon is a breeze. This modern local development environment simplifies the process, making it quick and straightforward. Let’s dive into the simple steps needed to get your WordPress site up and running on Laragon.
Download WordPress
Begin by downloading the latest version of WordPress. Here’s how:- Go to WordPress.org.
- Click the ‘Get WordPress’ button.
- Hit the ‘Download’ link for the latest version.
Create WordPress Database
Next, set up a database for your WordPress site:- Open Laragon and start your server.
- Click on the ‘Database’ button.
- In the popup, select ‘Create new’.
- Enter a database name and hit ‘OK’.
Install WordPress On Laragon
Time to install WordPress on Laragon:- Move the extracted ‘wordpress’ folder to
'laragon/www/'. - Rename the folder to match your site’s name.
- In Laragon, click ‘Reload’ to recognize your new project.
- Browse to ‘{your site’s name}.test’ in your web browser.
- Follow the on-screen instructions for WordPress setup.
- Fill in the database details with the name you created earlier.
- Complete the WordPress installation.
Configuring WordPress On Laragon
Now that WordPress is on Laragon, let’s shape it to perfection. It’s time for the fun part – configuring WordPress. Settings, themes, and plugins. All easy to choose and install on Laragon. Let’s dive in and bring your site to life.
Basic WordPress Settings
First things first, basic settings ensure your site runs smooth. Here’s a quick guide:- Site Title: Give your site a catchy name.
- Tagline: Add a short and sweet description.
- Email Address: Use an active email for admin purposes.
- Permalinks: Set up SEO-friendly URLs.
Selecting Themes And Plugins
Themes and plugins turn your site from drab to fab. Let’s pick them well.
Themes decide your site’s look. Follow these steps to select one:
- Go to Appearance > Themes.
- Click ‘Add New’ and browse.
- Preview, install, and activate your choice.
Plugins add extra features. Here’s how to add them:
- Navigate to Plugins > Add New.
- Search for needed plugins.
- Click ‘Install Now’ then ‘Activate’.
Testing The Installation
Once WordPress is installed on Laragon, it’s important to make sure everything works fine. Testing involves checking your new site’s accessibility and functionality. This ensures a smooth start to your website building process. Let’s walk through the necessary steps.
Accessing WordPress Site
To visit your WordPress site, you need to know the right address. Start by opening your preferred web browser. Type in the local address you created for your WordPress site during the Laragon setup. Usually, it looks likehttp://yourproject.test. Press Enter. You should see your WordPress site’s landing page.
Checking Functionality
It’s time to verify that every WordPress feature operates correctly. Start with the basics:- Login to your WordPress dashboard using the admin credentials you set up.
- Create a new post and preview it to ensure the editor works.
- Install a plugin and activate it to check the plugin functionality.
- Change your theme settings, then view your site to confirm the changes.
- Check if links are clickable and lead to the correct pages.
- Ensure that media upload functions properly by adding an image or video.